 A few months ago I found the nienie dialogues. I loved her sense of style, especially her choice of earrings. Shortly after I fell in love with her bright red rose earrings I found an identical pair at Forever 21, for only $4.80! I bought as many as I could but like many sets of things (socks, shoes, gloves), one would get lost....found....then lost again. So I found myself back at Forever 21 looking for my favorite rose earrings only to find a whole lot of 80s checkered hoopy things. Ugh. I'm sorry, am I the only one who doesn't like parachute pants and acid washed denim mini skirts?
Then one day, as I was searching for material at my nearby fabric store I had an idea. The store carries hundreds & hundreds of salvage buttons. Their selection is pretty impressive. Among their inventory I found tiny roses.
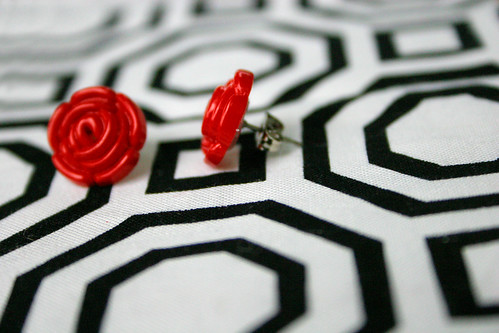
And with that I made these. They look just like the ones Nienie wears....see here. Her sister cjane actually wrote a post with a link to a store that sells them. But you can 'make them' for less than $1.
Plus, I think this is a GREAT gift idea. I'm going to make a ton of these and give them as extra bonus Christmas and birthday gifts. Something to pad the bag, ya know what I mean?

First choose your buttons. I suggest buying the kind that have a loop in the back rather than holes. It's very easy to snip the loop off the back but it's more difficult to hide holes.
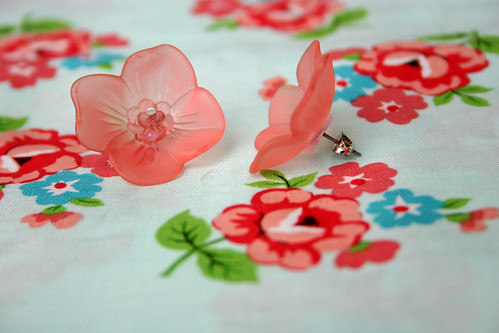
As I mentioned earlier I liked the rose shape. However, I wanted them in red, sea green and yellow. The fabric store only had them in pearl. So I bought several and took them home.
Whoops. That metal button doesn't belong. It fell off my shorts and must have been in my pocket with the rest of the buttons.

You also want to purchase the earring backs (pearl posts and findings). I bought mine at JoAnn Fabric. A pack of ten was only $1. If you can't find them where you live, you can buy a pack of 60 posts and here and a pack of 144 findings here.
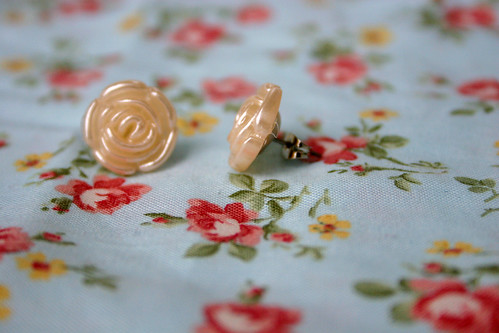
So, now you have your materials. If you didn't find a color you wanted you can do what I did. See pearl colored ones to the left.

I took the rose shaped buttons and spray painted a pair red. Spray paint works well because it dries very quickly, adheres to plastic well and leaves a shiny finish. However, I only had red spray paint. For the sea green earrings see next step.
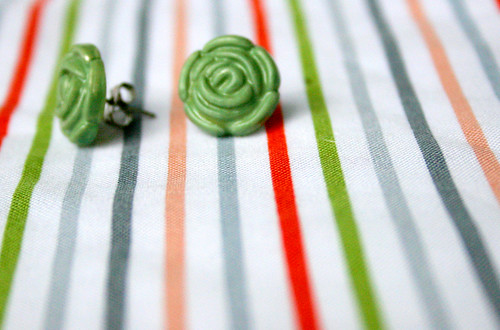
 For the sea green pair, I used acrylic sea green paint only 50 cents at JoAnns. It said to only use on porous surfaces but for 50 cents I thought I'd give it a try. It seemed to work much better than I anticipated. I could still see a little bit of the pearl underneath but I liked the way it looked....more antiquey. If you want a more solid color a few more coats may be needed. Wait an hour between coats.
After it was dry it had a matte look so I sprayed a little polyurethane I had on hand. But I bet clear nail polish would work just as good!

After it has dried, take a pair of wire cutters and snip the hook off of the back of the button. It should come off very easily. Like butter.
 Then take the post and dab a little hot glue on the tip. Now, if you are making these for a gift I might suggest using something stronger like epoxy resin. You can buy it at most craft stores and hardware stores. It comes in two syringe like containers that you mix together. It will probably hold better than hot glue but if you're in a hurry or don't feel like buying epoxy resin, a glue gun will work just fine.
Brian was nice enough to model this shot. Although he did complain about the glue gun being "hairy".

Once you have the glue on the tip. Put the flat side of the button over the glue and press down. Let dry. Then voila! You're done. It's almost TOO easy!
If you bought a little box and batting you could easily give these as gifts.

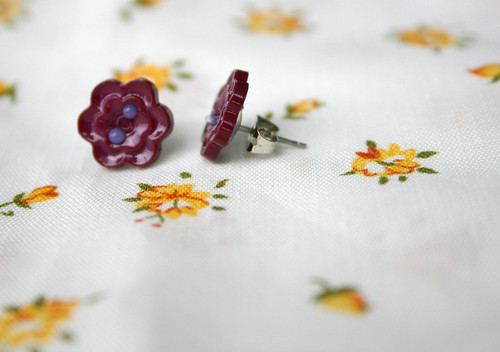
These were another set I made. See below for all sets. The earrings I made in this post are all included in the giveaway.
When you are making your own just remember, your designs are only limited by your local selection. Although, I always suggest looking online.
The earrings included in the giveaway have never worn (I've made a duplicate red pair) and have been cleansed with alcohol.
Now, I realize that this is not a sewing related post, however, I like to think that Grosgrain is as much about sewing as it is about fashion. And in my opinion these earrings SCREAM sophistication:)
Feel free to either link for the tutorial or link for the giveaway and use as many pics as you like. You know you never have to ask:)
 Ooo, ooo, ooo. I just had a flash of inspiration! Like Greg Kinnear in that car movie!
If you were to give a couple of these as gifts you could spray the metal backing green so that they would look like a rose with a stem and the findings would look like leaves!
You could use floral foam, place it in the bottom of a small gift box and stick the rose earrings up like growing flowers!
Oh, I'm so putting this on my Christmas list! All you family members out there, ignore what you just read!
UPDATE. A fellow reader just introduced me to flower cabachons. You can buy them on etsy here. Afforable and require no painting or wire cutters! And so chic! Thanks so much S.L.North
who by the way has the most charming paper poppies in her etsy shop!
As usual, if you would like a chance to win these earrings just link back to this post. If you have any questions see the "questions and answers" link to the right. If you use blogger just use the "create a link" link at the bottom of this post. If you don't use blogger, that's fine too. Just create a link on your page as you normally would and I will see it using Technorati.
Create a Link
Post Title
→Vintage Earrings Tutorial and GIVEAWAY!!!! CLOSED.
Post URL
→http://bizzybbakes.blogspot.com/2009/06/few-months-ago-i-found-nienie-dialogues.html
Visit bizzybbakes for Daily Updated Wedding Dresses Collection


